Setup own certificates for ESXi 6.5
Spoiler: Like many other services, ESXI uses a web configuration interface that uses a self-signed certificate. Today we'll show you how to change the default certificates to replace them with your own. You will need to activate SSH to upload the new certificates. Then restart the machine to take the change into account.
Rather than having a physical machine for each of our servers, we preferred to virtualize them with ESXi on a Dell R620. It's true that it's a big machine, which requires energy and air conditioning, but with no less than 15 virtual servers, it pays for our carbon impact.
Like other services (ie VitalPBX), ESXi uses a web configuration interface which, by default, is unsecured with a self-signed certificate.
Today, we will therefore show you how to modify the default certificates to replace them with yours, signed by your own CA and therefore automatically validated by your browsers.
Upload your certificate
As you are pros at certificate creation, I'm assuming you already have your two files available (the key in esxi.pem, the certificate in esxi.crt).
Although menus talk about security and certificates, the ESXi web interface does not allow the kind of configuration that we will be doing here. We will have to get our hands dirty and modify the files directly via SSH1.
Enable SSH
By default, the SSH server is not started. Considering the few cases where we need it, that’s quite a good thing, but today we’re going to need it and so we’re going to start it.
For that, we go to the Manage menu (on the left of the interface) then in the Services tab. We click on the line corresponding to SSH then on the start button.
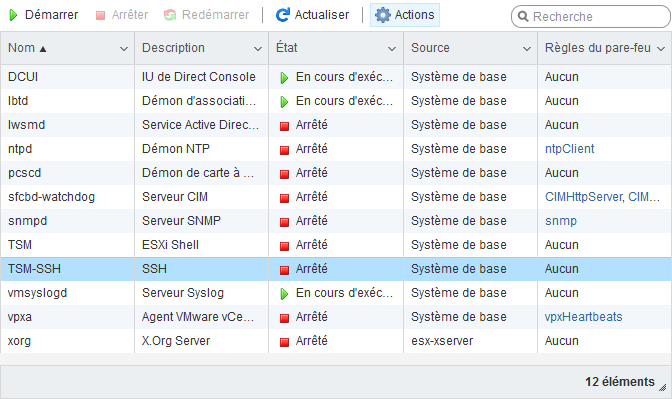
Note that the start is only temporary. When the server restarts, the service will not be automatically started, which is exactly what is needed today.
Save the old ones
As always when you want to be careful, it is a good idea to back up old certificates. If something goes wrong, we can reinstall them to return to the initial configuration. To do this, we will simply rename the two original files (key and certificates):
cd /etc/vmware/ssl
mv rui.crt orig.rui.crt
mv rui.key orig.rui.key
Personally, I actually renamed anything that started with rui to orig.rui.
Replace with the new ones
Now that the stage is free, you can add your files in place of the old ones. There are plenty of way to do so, here is one using SCP from ESXi if we consider the following particularities:
- you is your account name on your machine,
- yourmachine is the hostname or IP address of your machine,
/home/you/is your home directory on your machine and contains the certificates.
cd /etc/vmware/ssl
scp you@yourmachine:/home/you/esxi.crt rui.crt
scp you@yourmachine:/home/you/esxi.pem rui.key
Personally, I have used winscp, it is much more convenient 😉 but the screenshots are less accessible.
And after ?
We could try to just restart the web interface but since the documentation says to restart the host, that's what we'll do3.
So we go to the Host menu (on the left) and click on the ‘restart’ button and we will need patience because a server takes time to start 😭.