Setup LDAPs and TLS on an Active Directory
Spoiler: Centralizing authentication is good, but protecting these communications is better. Because, by default, Active Directory does not use TLS, we will provide it with a specific certificate (and its key) so it will use it automatically at startup.
One of the interests when you have an Active Directory @home, is that you can use it as an identity provider for all your other services via the LDAP protocol.
By configuring all compatible services to use LDAP during authentication, your users will then be able to use their domain account anywhere. And since they will only use one password, they can be asked to choose a strong one, they will be less inclined to cheat.
The problem is, the Active Directory LDAP service listens in clear by default. If you use it as is, anyone who can listen on the network can read all traffic (and, among other things, find passwords).
Fortunately, you can setup your server to protect these communications with TLS. To complete the official documentation, we decided to share our method with you.
Create a certificate
Who says TLS says certificate that must be generated. You could start head on but Active Directory has its little conventions to make it all work.
In the following, I assume that you already know how to create certificates and will therefore only show you the specific tips (otherwise the article would be way too long). If you have any doubts, you can read our other article on how to use XCA (which contains all the usual steps).
Sign with an authority
This is obvious when we assume that a self-signed certificate is not secure, but it may be worth remembering that the certificate must be signed by a duly recognized authority (us).
The certificate was issued by a CA that the domain controller and the LDAPS clients trust. […]
Official help center
So, from the start, the first configuration tab, you choose the certificate to sign that of your LDAP (at home, our root is called root, easy to remember).

As it is for a TLS server, we took a small shortcut by applying the “TLS Server” model from the first configuration tab.

Hostname
This convention comes later in the official doc but we find that it is more practical to do at the beginning...
The Active Directory fully qualified domain name of the domain controller (for example, DC01.DOMAIN.COM) must appear in one of the following places:
- The Common Name (CN) in the Subject field.
- DNS entry in the Subject Alternative Name extension.
Official help center
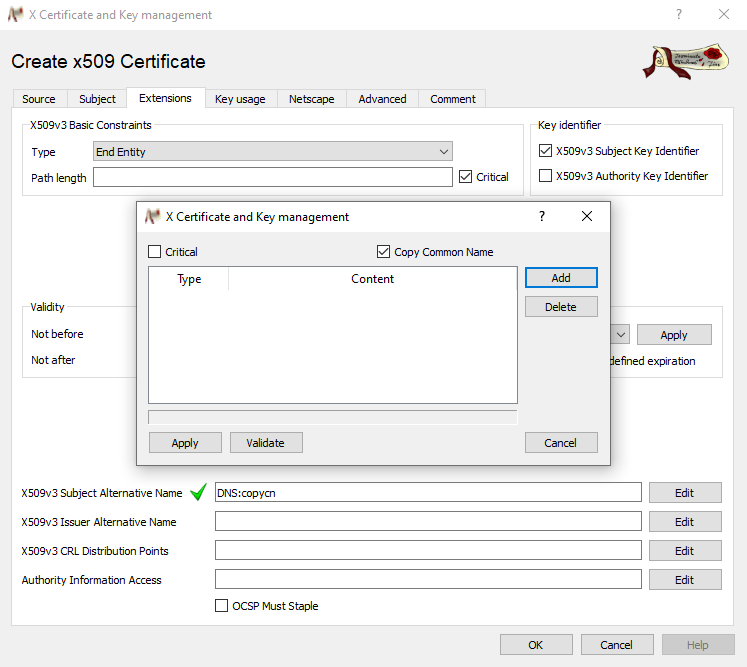
For the common name, it is in the first tab of XCA, in the “commonName” box. You can of course configure the other fields to make it cleaner but that will not impact the service.

For the DNS entry, the so called “subject alternative name” which is configured in the third tab. You can, like us, check the "copy the common name" box to avoid entering it a second time.
Extended usage
When you know what you're talking about, it's very simple here too.
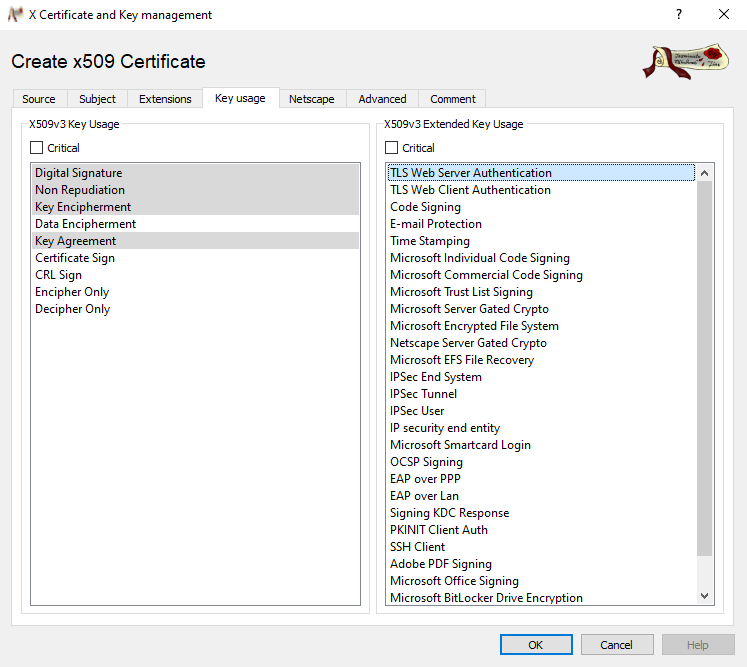
The Enhanced Key Usage extension includes the Server Authentication (1.3.6.1.5.5.7.3.1) object identifier (also known as OID).
Official help center
To translate it for you and for you to understand it, you have to start from the end ... The OID is the sequence of numbers in brackets, it is what softwares are exchanging to understand each other. But, as we are humans, we also give them names (which are supposed to evoke their usefulness).
Using an online directory, we find that the OID 1.3.6.1.5.5.7.3.1 is called in fact "Transport Layer Security (TLS) World Wide Web (WWW) server authentication" (we do find this idea of authenticating a server, but it is more precise).
To configure our certificate, we then go to the fourth tab and in the Extended key usage area (nothing to do with enhanced and improvements), we select the first element.
Export certificates
For the root, I'm assuming that you have already exported the certificate to a specific file (like root.crt).
For the LDAP certificate, it is not, strictly speaking, obligatory, but I found much more convenient for the continuation to export the certificate and the key in only one file in the PKCS #12 format (rather than the two files that I usually suffix .crt for the certificate and .key for the key but each has its own little quirks1).
With XCA, you must select your new certificate from the list then click on the “Export” button (this is also accessible via a right click).
In the export screen, choose the PKCS #12 (* .p12) format, select the location and name of your file and click OK.
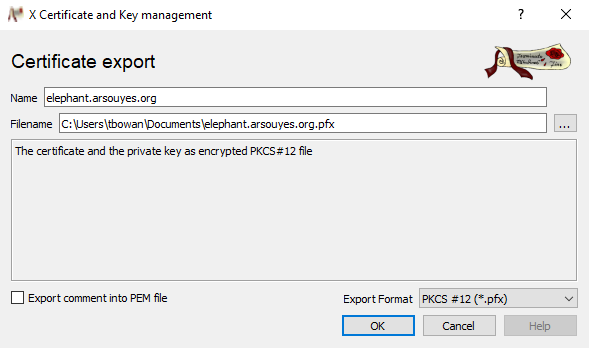
As promised, XCA will ask you for a password, twice to make sure you haven't made a typo.

Import the PKI
For LDAP to listen on the appropriate port (by convention, TCP port 636), we simply need to integrate the certificates in "the personal certificate store of the local computer" (according to the doc) and the service will open the port all alone. Don't worry, as always, it's easier than it looks.
There are tutorials for using commands, PowerShell and all but personally I found their GUI tool to be more intuitive to use.
In a command prompt (cmd.exe, via the shortcut ctrl + r or via the menu), launch the ultimate tool (as administrator but since you are on your AD, it should already be the case):
certlm.mscAs the name suggests, you are in the local computer certificate store 🎉.
Import CA
I can't resist quoting you the rest of the documentation concerning the signing by an authority:
[…] Trust is established by configuring the clients and the server to trust the root CA to which the issuing CA chains.
Official help center
For clients, it concerns the different services that will connect to LDAP, it does not concern us this time. We will rather take care of the server.
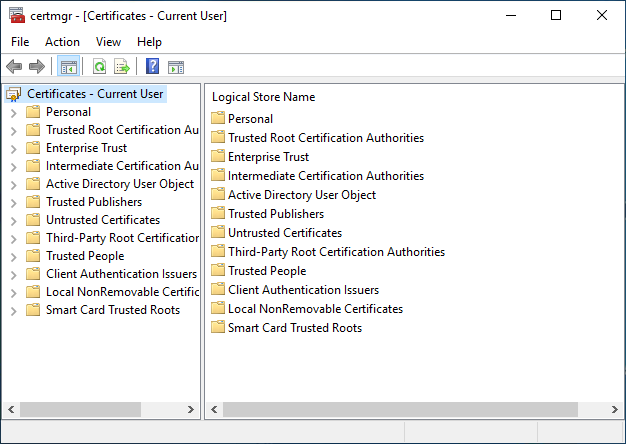
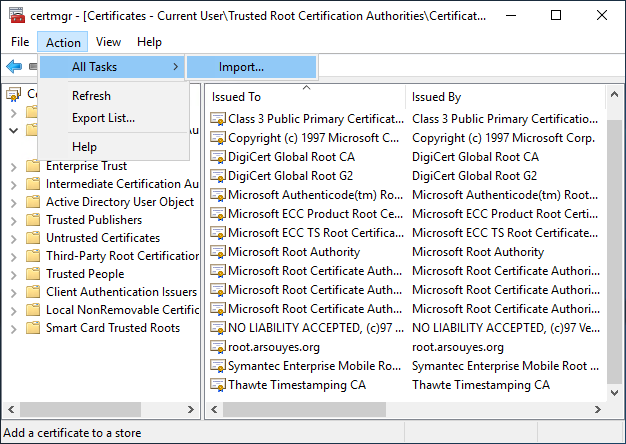
In the list on the left, expand the second folder "Trusted root certification authorities" then select the "Certificates" subfolder.
If you like playing, right-click in the white area after the certificates, without touching any certificate, the “All tasks” menu will then contain an “Import…” item. If you touch a line with a certificate, the menu will only contain “open” and “export”.
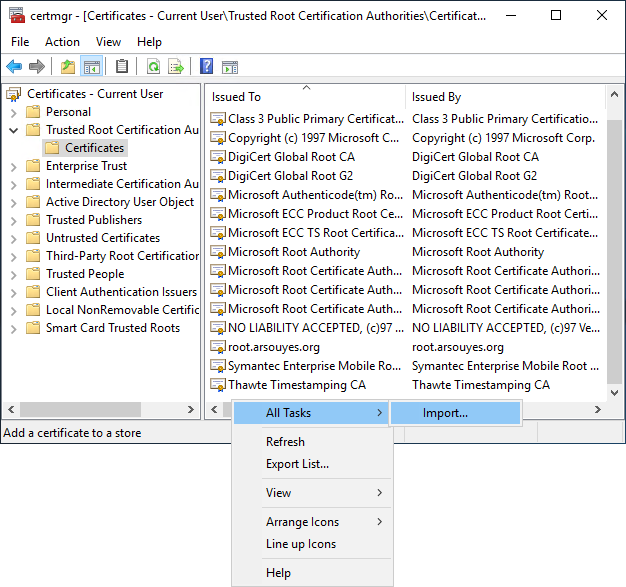
Otherwise, make sure that no certificate is selected, (if it is already too late, you can click on another folder and then come back to this one), the “Action” menu contains the sub -menus "All tasks" then "Import ...".
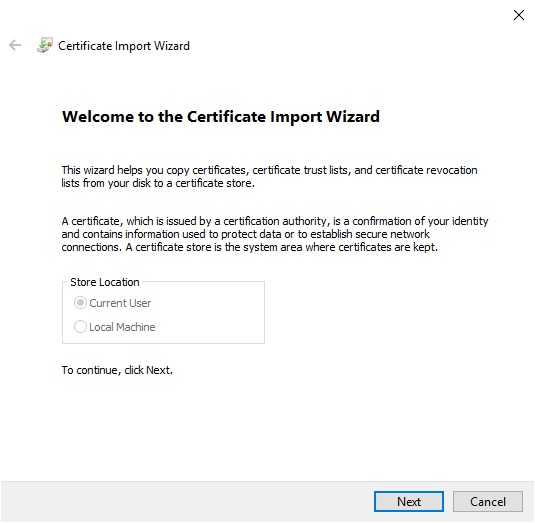
The wizard opens and allows you to proceed with the import. The first screen is for information only, click on "Next".
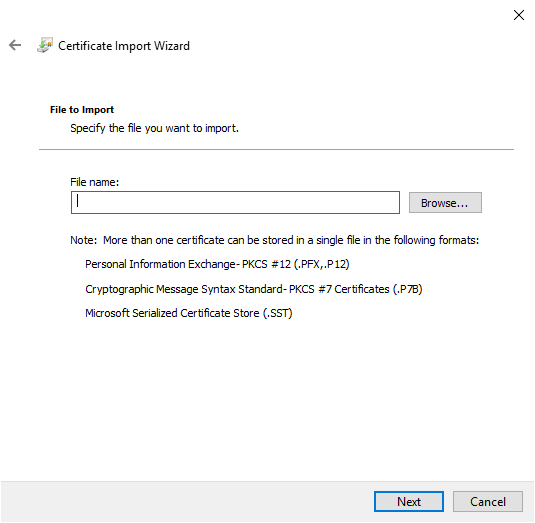
The second allows you to choose the certificate, click on the "Browse" button. Choose the file (corresponding to the certificate of your CA).
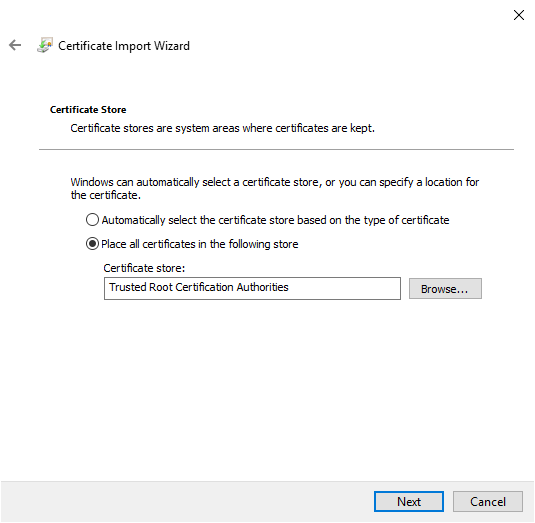
Clicking "Next" will take you to a summary, check that you are in the authorities store (it should be the case).
Clicking on "Next" will take you to the last summary...

Click “Finish” and your certificate will appear in the list.
Import the p12 certificate
You can now continue reading the documentation… out of order for simplicity (otherwise we must generate the certificate before configuring it…).
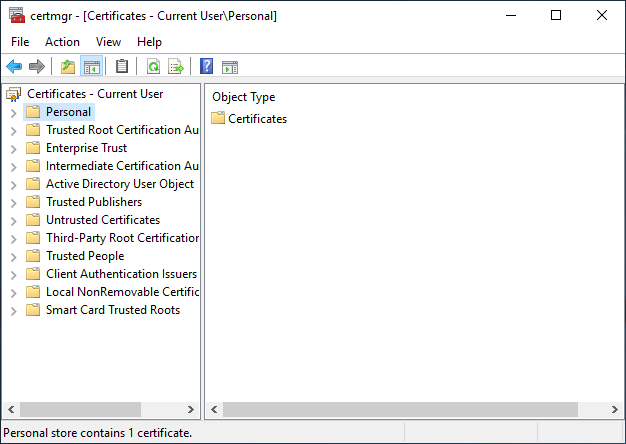
The LDAPS certificate is located in the Local Computer's Personal certificate store (programmatically known as the computer's MY certificate store).
Official help center
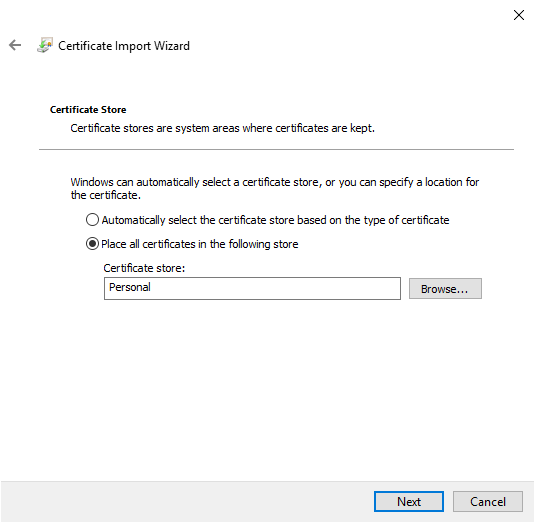
It seems weird, it's actually quite simple. In the list of folders on the left, the first one is called "Personal", that's what you have to choose. If certificates have already been added, it contains a "Certificates" directory to which you must go.
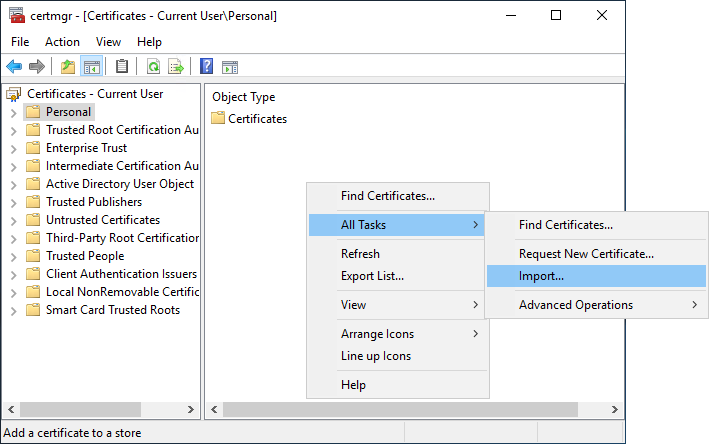
This time, the whole area is empty, we can right-click more easily, choose “All tasks” then “Import…” (also works with the menu).
The same wizard as before opens and you can continue (click on "Next").
The second allows you to choose the certificate, click on the "Browse" button and this time, choose the certificate file provided for LDAP, in PKCS #12 format and whose name ends with .p12.
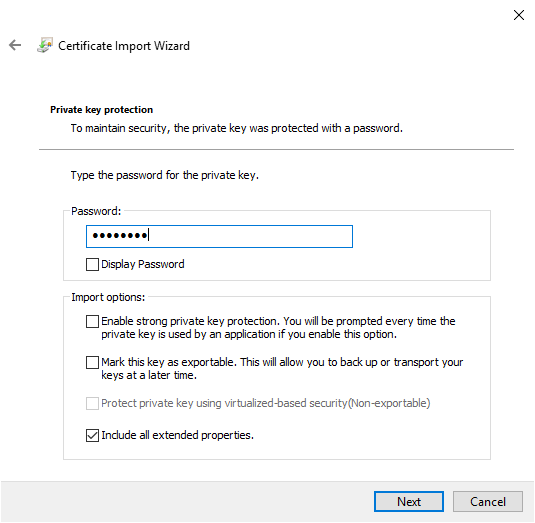
Since the file is protected, the next screen will ask for the password. Enter it and click "Next".
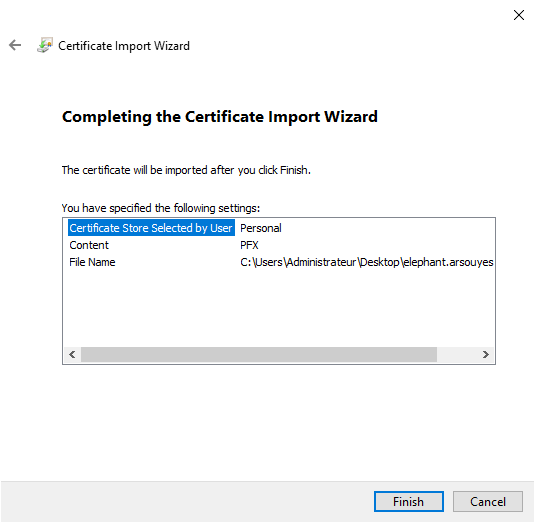
Clicking "Next" will take you to a summary, check that you are in the personal store (it should be the case).
Last check (we are never too careful) and it will be over.
Restart the AD
For LDAP to listen in TLS, it would have to be restarted and everything would then be done automatically.
The problem is that there is a whole ecosystem of programs that manage services, certificates and god knows what else, it will be pointless to restart only LDAP because the others will not necessarily be ready. And they won't see the difference.
So restart your domain controller (preferably when no one needs it).
And after ?
When your Active Directory starts, it will see your certificate, realize that it can use it to secure its connections with LDAPs or starttls and will therefore activate these features.
Now, all you have to do is configure all your services to use your AD's LDAP as an identity provider and avoid having lots of accounts everywhere. Your users will appreciate it (and you will too).